If you want to make multiple copies of the same bleached shirt, then there are two methods:
- Cut a stencil by hand.
- Use a plotter/cutter machine like a Cricut or Silhouette to cut stencils.
I will focus on the first method as its concepts apply to the machine automated method.
For the stencil material, you will want something that is DURABLE. If you can easily rip or tear the material by hand, then it will be difficult to apply adhesive and remove that material without damaging your stencil. Secondly, you want the material to be THIN. If the material is too thick, then the stencil will block your mist spray. The blocking effect looks something like this:
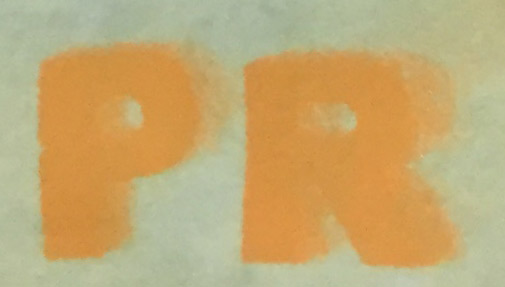

In the pictures above, you can see that the wooden block letters cast a shadow on the coloured paper that I used to practice with. The wooden blocks are a little too thick.
Finally, look for a material that is WATERPROOF. If water can get through the material, then it will carry the bleach along and cause bleach to affect areas that shouldn’t be affected. Masking tape is NOT waterproof.
Good stencil materials:
- Old plastic folders used to hold paper. (Dollar store.)
- Slide transparencies. (Office supply store or things that teachers throw away.)
- Transparencies used for silkscreening. (Ebay? or silkscreen supplier.)
- Adhesive mylar or duralar. (Artist supply store.)
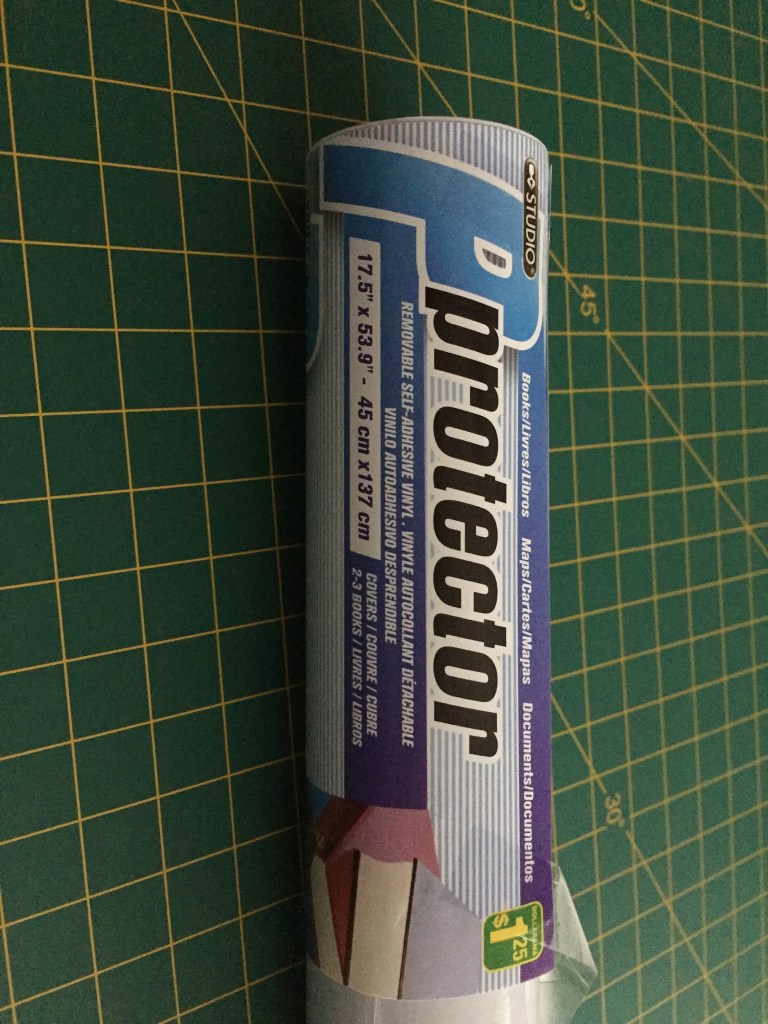
If you have a plotter, then you can also look into plastic films used to protect books (dollar store) as well as adhesive cupboard liner (Home Depot).
With a plotter, you can use any of the traditional adhesive materials that you would use to make stencils in a plotter. The advantage of using a plotter is that your stencil material doesn’t need to be that durable. This means that you can get away with slightly finer lines in your stencil.
Cutting your stencil
Use a scalpel, cutting knife, or exacto knife to cut. You can find exacto knives at a dollar store.
If you do not have a cutting mat, use a large piece of cardboard. Many retailers like supermarkets will give you large pieces of cardboard for free because they are constantly throwing them out. Just ask the employees if you can get some free cardboard so that it doesn’t get sent to the landfill.
Print out your stencil on a piece of paper and use masking tape to make it stick to your stencil material. If your stencil material is transparent, put the paper print-out underneath your stencil.
Making your stencil stick to the shirt
As mentioned previously, height is bad. If there is a gap between your stencil and your shirt, then you will have blurry edges. Make sure that you cannot fit a dime underneath your stencil.
Use any of the following methods:
- Washable glue. Don’t think of this as glue. Think of this as a starchy gel that happens to act as a very weak glue. Smear this on your stencil. You can stick everything together without having to wait for the starchy stuff to actually dry. Thin layers of this will NOT block bleach as the water will dissolve through the starch and the bleach will dissolve through into your shirt. So, don’t worry about getting glue on your shirt as long as you use your fingers to smear the excess off.
- Repositionable adhesive. I’m not sure if spray adhesive at the dollar store will also work.
- Double-sided tape. Washable glue is easier to work with, but double-sided tape can also work if you happen to have it.
- (Not recommended) Thin tape that you roll into an “O”. While this works, your tape will usually be too big for finer stencil details.
- Your stencil material already comes with adhesive.
Dealing with “islands”
Islands are bits of stencil material that is surrounded by non-stencil. They are not connected to the rest of your stencil. There are a few different ways of dealing with this issue.
Method 1: Add “bridges” to your art.
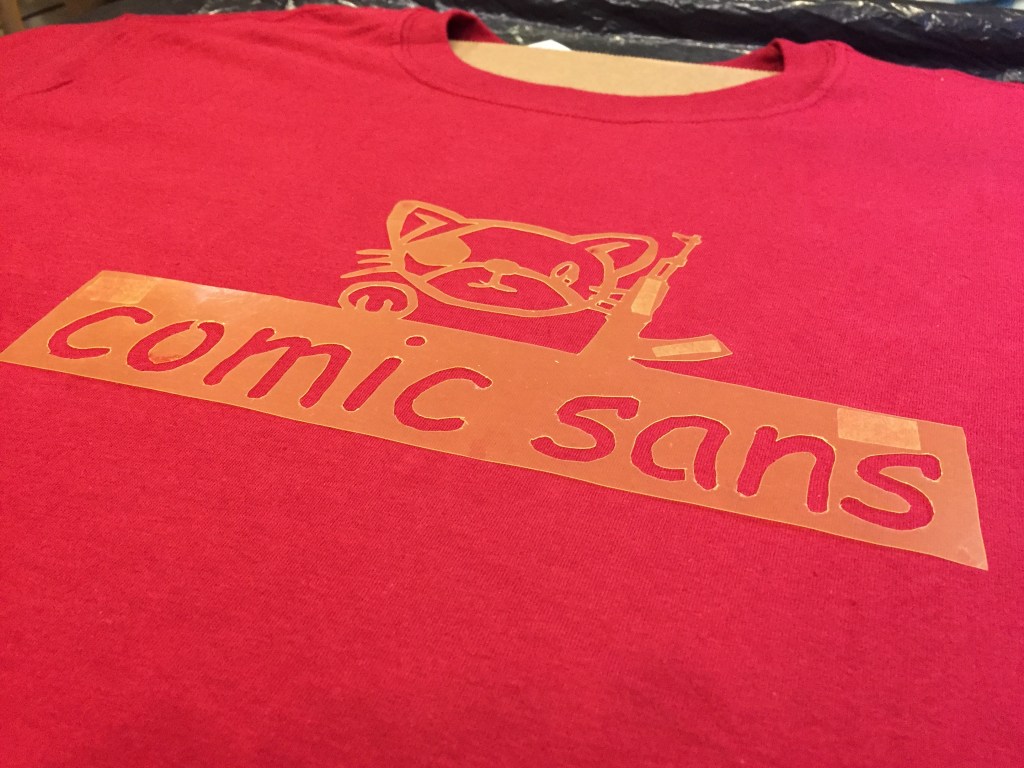

In the image above, you can see that a bridge was added to the “o” and the “a” in comic sans. Adding these connecting pieces will eliminate islands. Remember to make the bridges thick enough so that your stencil does not tear or warp easily.
Similarly, you can avoid islands by using stencil fonts.
If you want to make many shirts, this is the most attractive option as it is the least time-consuming.
Method 2: Position the islands by hand. This can be tedious if your positioning needs to be good, e.g. if you are dealing with “o”s and “a”s in text. A toothpick can help you manipulate small pieces of a stencil.
Method 3: Use transfer tape or another tape that is slightly sticky (e.g. painter’s tape). Basically, you use the slightly sticky material to hold everything in place when you remove or apply your stencil pieces.
Getting clean lines
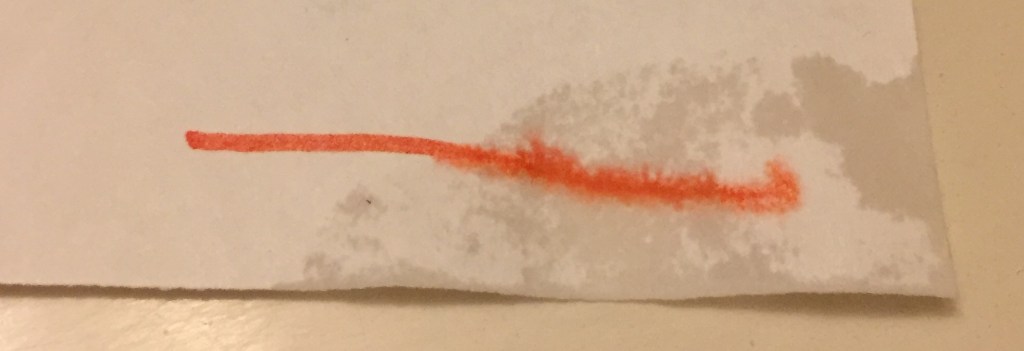
Water is the enemy of clean lines. If you apply bleach to damp fabric, the bleach will travel through the damp areas. In the picture below, I applied washable marker to a piece of paper that was damp on the right side. You can see that the line is clean until it hits the damp area. Bleach kind of works like that.
To avoid dampness, don’t spray too much bleach at once. Don’t let the shirt get too damp.
Once the shirt has been sprayed, there are a few ways of getting rid of moisture:
- Wait for water to evaporate. To get a feeling for how fast shirts dry, you can put water into your sprayer and practice.
- Use a hairdryer.
- Use an iron. This usually won’t work because the dryer will melt your stencil. An iron will work with freezer paper, but freezer paper is not reusable. Also note that heating bleach will create chlorine gas which is toxic. (A respirator mask may help with this?)
To dilute or not to dilute?
I would use undiluted bleach. I don’t believe that dilution affects the longevity of the shirt.
You want to use a shirt which contains dyes that react quickly with bleach. With these shirts, you will see the results of bleach within 5 seconds. The sodium hypochlorite will react with the dyes quickly and will be used up, so very little of the sodium hypochlorite will react with the cellulose/cotton in the shirt.
The best shirts are the ones that react strongly to bleach as you can get the colours you want with only 1 pass of spraying, which saves you time and avoids issues with the shirt being damp.
Use a mist sprayer or “atomizer”
Achieving a fine mist in your spray will minimize droplets of water. These droplets of water can be bad because they will disrupt your fine lines if they land on the edge of your stencil, causing bleach to bleed into your stencilled area.
You can find mist sprayers at Dollarama. The “Travel section” at a dollar store or Walmart may contain a travel-sized sprayer that will give a fine mist. Mist sprayers are also found in perfume and cologne bottles, and sometimes in the sprayers used for hairdressing.
Where to get your materials
If you live in Canada, you can get all of the non-fabric materials at Dollarama (a dollar store chain). Outside of Canada, I would go to a dollar store first and try to get as much as you can buy there. The rest of your materials can be found at other stores, Amazon, Ebay, etc.
At a dollar store, I would try to buy these supplies:
- Bleach. Make sure that you are getting chlorine bleach. Under First Aid treatment, it will say “contains sodium hypochlorite”.
- Plastic folder, preferable transparent. (Or slide transparencies.)
- Mist sprayer.
- Washable glue.
- Masking tape.
- Exacto knife if you do not own a cutting instrument.
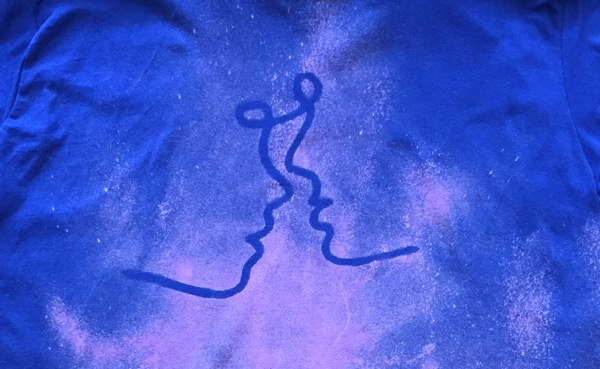
- (Optional) Toilet cleaner bleach. If you want to paint on t-shirts or add your initials, this form of bleach is better for direct application with brushes and toothpicks. The gel form leads to less bleeding. You can mix it with washable glue.
- (Optional) Adhesive plastic used to protect books. Useful for other bleach shirt projects. It’s easier to cut than thicker materials.
- (Optional) Painter’s tape.
Where to buy shirts
For one or two t-shirts, you can go to a thrift store. Hoodies are a good deal at thrift stores as they can be less than wholesale price. Look for 100% cotton as bleach will not remove dyes from polyester.
For multiple t-shirts, you can try online retailers such as JiffyShirts.com, Wordans, and anybody else advertising on Google Ads (e.g. do a search for “Bella Canvas 3001” and ads will show up). These retailers and Ebay will have similar pricing.
Art supply stores (e.g. Michael’s) and Wal-Mart may have good prices on t-shirts if they are on sale or clearance. However, you may prefer to have a reliable source of a specific t-shirt model and colour.
If you are buying very large volumes of t-shirts, you can deal with distributors directly- SS Active Wear, Alpha Broder, Sanmar, etc. Shirt manufacturers like Bella Canvas and Alstyle also distribute their own products. Search r/screenPrinting for information on dealing with distributors.
Results may vary
Unfortunately, there is a small chance that the dyes in your shirts don’t do what you want them to do.
- Some dyes take hours to react with bleach. Fruit of the Loom pink reacts too slowly with bleach, while Cyber Pink also reacts slowly.
- Some manufacturers “overdye” their t-shirts. They take an unpopular colour and add more dye to it to make black t-shirts.
- The dyes may vary from batch to batch.
- “Heather” colors, athletic t-shirts, and weird colors are not 100% cotton even though the rest of a t-shirt line is 100% cotton.
Bella+Canvas claims that they do not overdye or change dye formulations from year to year. They do not have weird creases/wrinkles around the shoulder seam. When you spray over a wrinkle, the final background shirt will look like there is a wrinkle in the shirt.
Downsides of reusable stencils
If you don’t care about re-using your stencil, then I suggest using adhesive plastic as your stencil material instead. It’s easier to cut, allows for slightly finer detail (because it’s easier to cut), and already comes with adhesive.
Have fun!
Check out r/BleachShirts. Feel free to leave comments on this blog post.

You’re a legend for making this!
LikeLike